Thursday, August 23, 2012

I painted more furniture....

Today, I painted the last two pieces of furniture for Brittany's bedroom.
Here they are.
Her tall dresser went from this....


to this......


Okay, I just realized that the first two handles are upside down.
LOL!!! I will fix that.

Then, her bedside table went from this....


to this....


I tried a glazing technique on the side table.
It's a lot harder to get it right than it looks.
It was a fun experiment.
And......she loves it!!

Well, that's all her furniture painted.
One of these days, I'll take a picture of her finished bedroom.
It will have to wait 'til school starts,
so that I can get in there and do a proper clean-up,
without her questioning everything I do. LOL!!!!
Teenagers!!!!

Hugs


Wednesday, August 22, 2012

A table for my sewing room!!! Added another pic..

Well, today I went about town looking for a table for my sewing room.
I stopped at the Habitat for Humanity Restore.
I had seen some table tops the last time I had stopped in.
I knew that they didn't come with table legs, but I thought I could work something out.
I chose one of the table tops.
It was $25.
After I paid for it, the man said he would get the table legs down from the shelf for me.
I was so excited to see that it came with legs.
There was damage to one corner of the table.
It looked like someone had ripped one of the legs off.


I managed to get my husband to cut some pieces of wood for me.


My son Brad is pretty handy, so I asked him if he would help me fix the table.
 He and I worked together for about 1 hour to get the broken pieces off the table top,
and the new wood pieces on.


We put the legs on, and now I have a nice large table to work on in my sewing room.


I still have to stain the new pieces, but I will get that done tomorrow.
I had to buy bolts and the wood that my husband cut to fix the table.
In all, it cost me $45.00 for this table.
I think that's a pretty good deal for a nice solid table.

Edited to add: Here's a picture of my table with my cutting mat, threads and sewing machine.
I'm moving in!!!
Note: It will look even better once I touch up the stain!!

I'm getting there!!

Hugs

Tuesday, August 21, 2012

I painted my new sewing room....

Hi everyone!

I know I haven`t blogged a lot this summer.
We have been doing renovations and all our extra time has gone to that.

Well, those renovations are coming close to the end.
We have made two new bedrooms in our basement for the boys.
They are all moved in, and settled.
I am all done my part of those renovations.
My daughter is moved into her new room.
I did not have as much work to do in her room.
We only needed to paint.
With that done, I got to work on the last room.

This is the best room of all, my new sewing room.
This room used to be my daughters room.
It was painted a very pale yellow.
That was the color of the room when we bought the house.
Here is a picture of it before being painted.


Here is the after picture.


I do need new blinds. LOL!!
But, that will come at some point.
I really like the color I chose.
It is a Robin s Egg blue by Para Paints.
I only used 1 gallon to paint the room, and only had about a quarter cup of paint left.
I was really worried that I would not have enough.

Now, I need to come up with a work table.
I do not currently have one to put in here.
I have been searching on Pinterest for ideas.
At least now I can start moving some of my stuff into the room tomorrow.

I am getting really excited now.
I will have my very own sewing room.
Yeah!!!!

Hugs

Friday, August 17, 2012

New bright fabrics......

Today, I decided to go shopping for fabric.
The local quilt shop, "Quilt & Stitch" has been having some great sales all summer.
All our extra money has gone to our renovation project, so I hadn't taken advantage of the great sales.
Until today, that is!!!

 I needed some fabric to make a gender neutral baby quilt.
So, I chose some bright fabrics in colors of the rainbow.

I was trying to get all my fabrics with dots,
since I'm participating in the 
Sew we quilt
Dots on Dots Blog Hop in September, but some colors didn't have any dotted fabric available.
Every block I make will have some dotted fabric in it though.

My brother and his wife are expecting a baby in September,
 and the sex will be a surprise at delivery time.
I find that exciting!!
I never new the sex of my three kids until they were born.
I loved how people would comment....she's carrying to the front, it's a boy.
Or try the needle and thread trick over the wrist to determine the sex.
You know....old wives tales!! LOL!!
After two boys, everyone thought my third baby was a boy, by the way I was carrying.
But, to all our surprise it was a girl.
I was so happy!!

Anyways, I will start working on this project soon.

I hope you are all well.

Hugs


Monday, August 13, 2012

Everitt Park with Brittany....

An evening by the water in Kingston, Ontario.
Everitt Park
Lake Ontario


Hope you are all well!!

Hugs


Sunday, August 5, 2012

9-Patch Flower....A block tutorial......

Hi everyone!!

I thought I would share a tutorial of the blocks I made for the Think Christmas Blog Hop.
I'm going to call it "9-patch flower".
Since, I don't know the name of this block.
Note: If you know the original name of this block, please let me know.

I will give you dimentions for the 12.5 inch block and the 6.5 inch block.

Cutting Instructions for 12.5 inch block

8 - 4.5 inch squares of main dark/medium colour fabric
1 - 4.5 inch square of light or fussy cut fabric
20 - 2.5 inch square of light fabric

Cutting Instruction for 6.5 inch block

8 - 2.5 inch squares of main dark/medium colour fabric
1 - 2.5 inch square of light or fussy cut fabric
20 - 1.5 inch squares of light fabric

The instructions from this point on are the same no matter what size you make.

1 - Draw a diagonal line on the small light coloured squares.
Then draw an aditional line 0.5 inch away from the original line.
Note: for the 1.5 inch squares, I made the second line 1/4 inch away from the diagonal line.

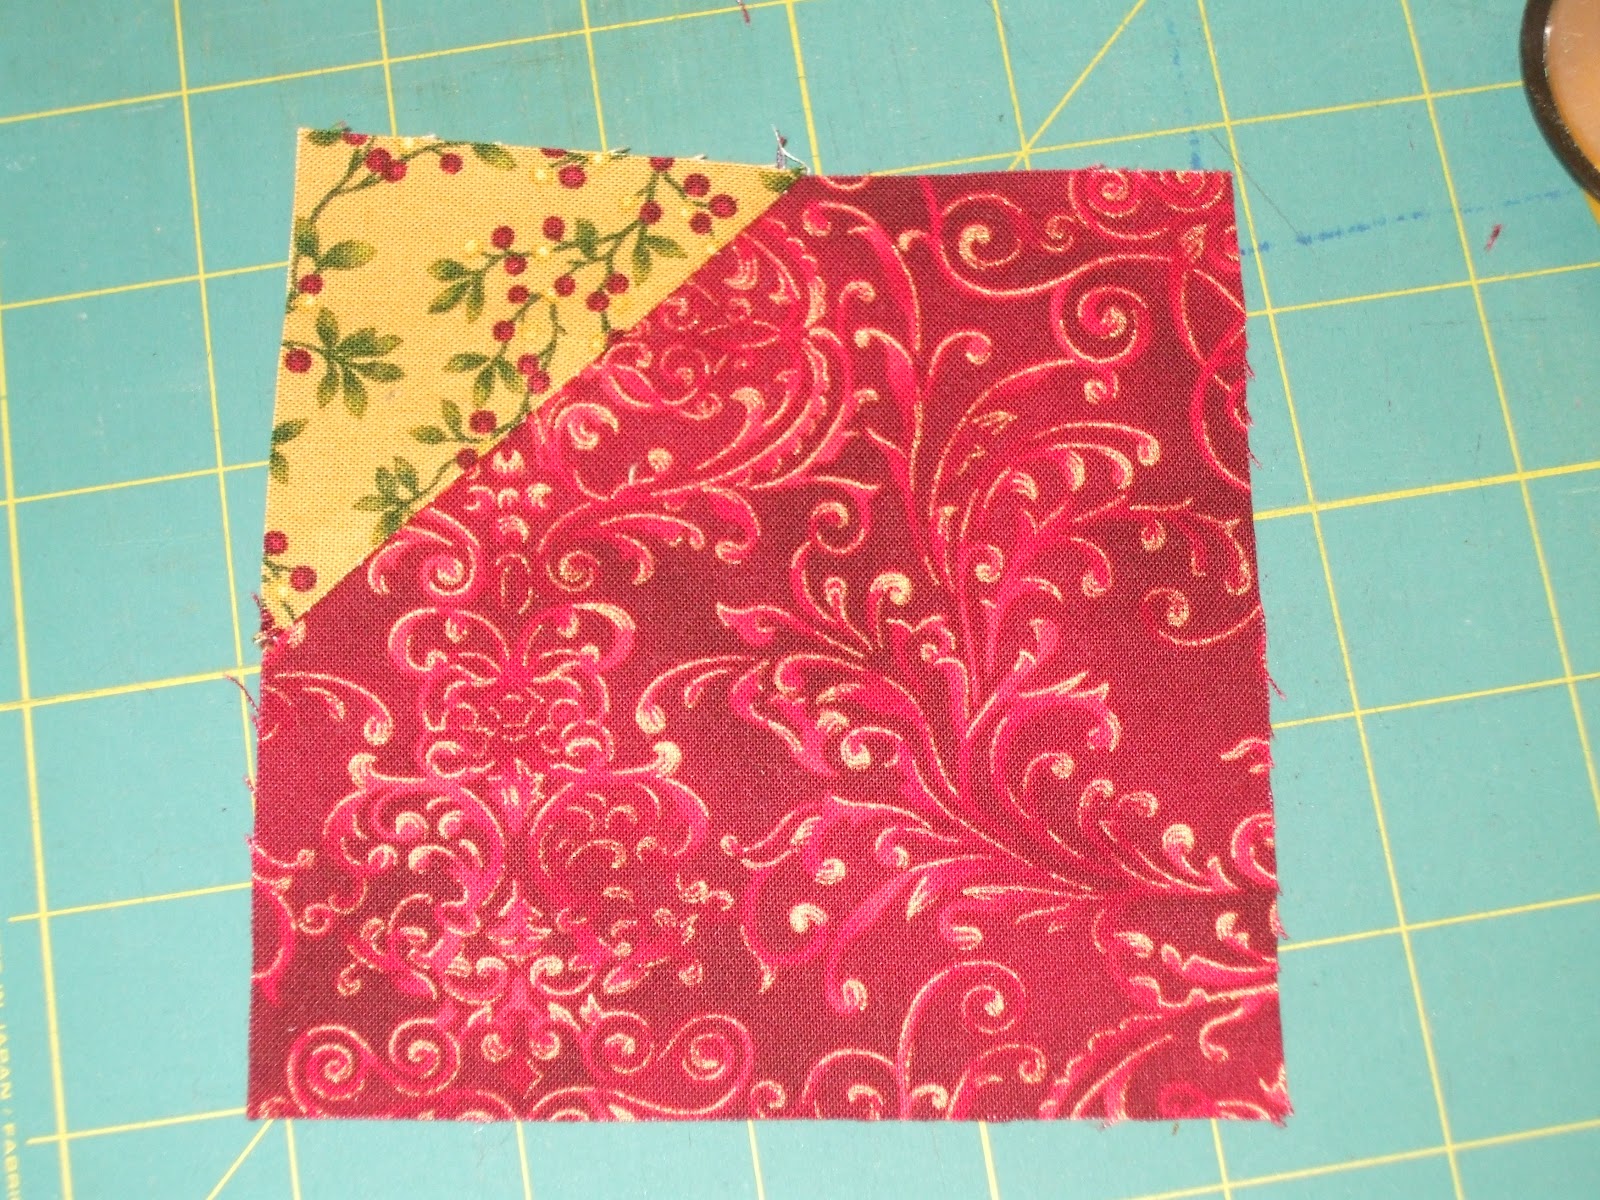
2 - Align the small light squares, right sides together, on the corner of the dark square and sew along the pencil line. Repeat this with all eight large dark squares.

Then sew on the second pencil line of each square.

3 - Cut between the pencil lines.


and iron the light fabric back, as shown below.


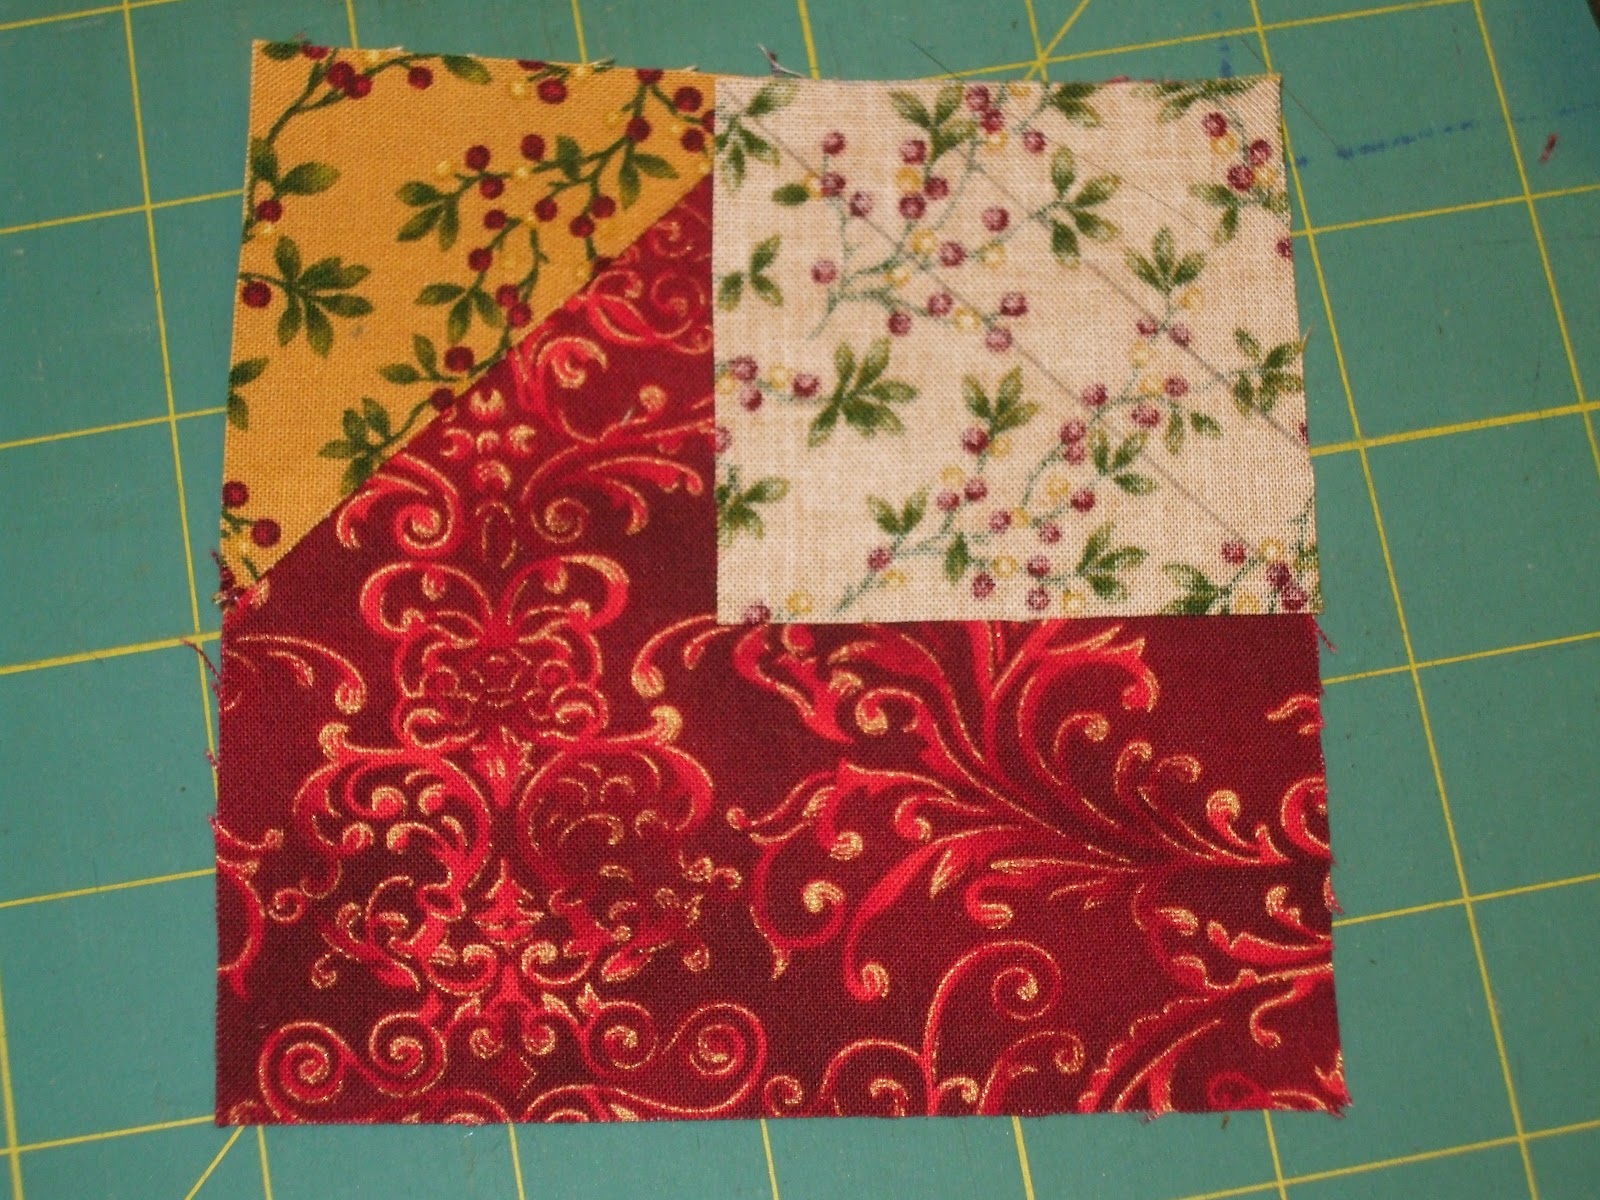
4 - Add another light square to the adjacent corner, as you did in step two.
Sew on the diagonal pencil lines, then cut apart.


5 - Iron the light fabric back.
Set 4 of the blocks aroung the fussy cut block as shown below.

6 - Take the other 4 blocks and add another light square to the third corner
and sew on diagonal lines.

Cut apart, iron the light fabric back.

7 - Arrange all the blocks and sew them together.
I pinned the squares together and lined up the diagonal seam.
This will make the angles meet up just right.

Here's the finished block.


I used Christmas fabric here.


Wouldn't this look good in summer fabrics too?

I'll have to try some out.

If you have any questions, let me know!!

Hugs


Saturday, August 4, 2012

Let`s think Christmas!! New Pics!!!


Hi everyone!!

It`s my day for the Think Christmas blog hop.

I`d like to thank Madame Samm And Lesley for organizing this event.


Edited at 12:44 Aug.4,2012:  

I decided to take pictures outside with natural light.
The original pictures below were taken at 1:30 in the morning when I finished my quilt.
Ha....ha.. I know....I was at the last minute.
But, I worked 6 out of seven days coming up to my day...so...you know how it goes..LOL!!!


So those are the new pics.
I kept the originals below.


I got my Christmas fabric scraps out and decided to make 4, 6.5 inch blocks.
I fussy cut the centre squares with snowmen prints.


I designed these blocks one day when I was making sketches in my book.
I decided to sew them together to make a 12.5 inch block. 
Then I made a 3.5 inch string border.
I hand quilted this little quilt with embroidery floss.
I hope you like it!!
I just got this done in the nick of time!!


Don`t forget to visit the other blogs today!
It`s been a wonderful blog hop so far.


Hugs